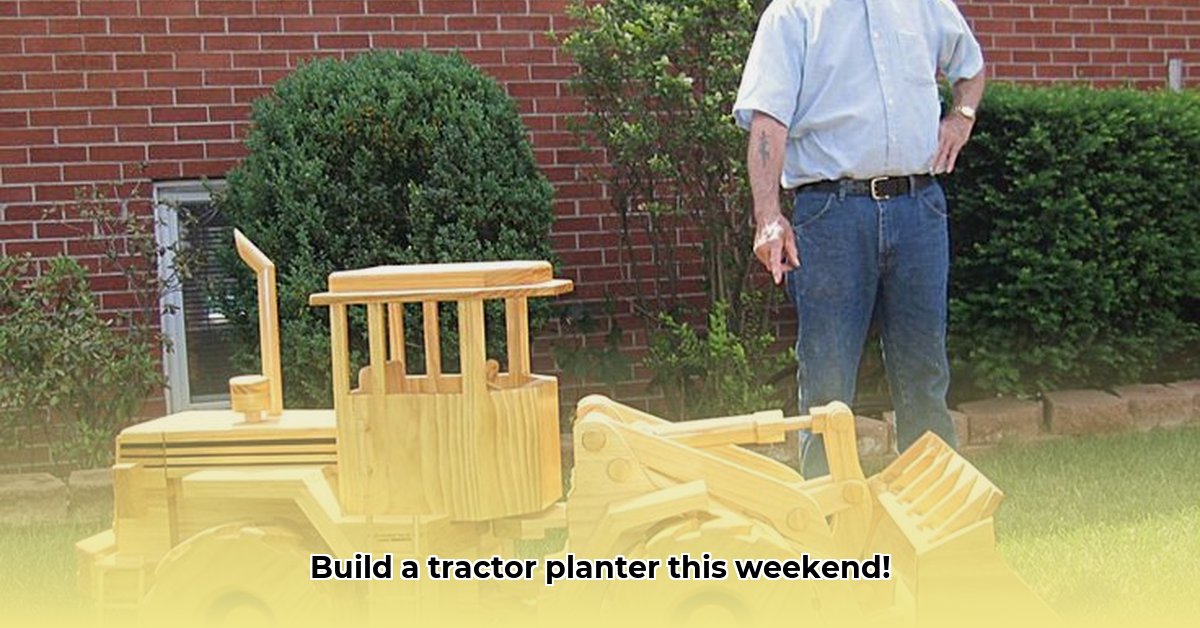
Want a charming, rustic planter for your garden without spending a fortune? Build your own wooden tractor planter! This easy-to-follow guide provides step-by-step instructions, comparing two different plan sources so you can choose the perfect project for your skill level. Get ready to create a unique garden accent – and save money in the process! For even more tractor planter ideas, check out these tractor bed plans.
Choosing Your Free Wooden Tractor Planter Plans: A Comparison
Two fantastic free plans are available, each offering a unique approach to building your wooden tractor planter. Let's call them Plan A and Plan B. Plan A emphasizes simplicity and rustic charm, ideal for beginners. Plan B offers more advanced designs and customization options, perfect for those with more experience.
Here's a comparison to help you decide:
| Feature | Plan A (Simple Charm) | Plan B (Advanced Options) |
|---|---|---|
| Estimated Cost | Very low (under $5, potentially free!) | Varies – depends on wood choice and embellishments. |
| Skill Level | Beginner-friendly | Beginner to advanced |
| Essential Tools | Hand saw, drill (optional), sandpaper, measuring tape | Table saw, router (possibly), additional specialized tools |
| Aesthetics | Rustic and charming | Highly customizable |
| Material Choices | Reclaimed pallet wood (check for treatment!) | Reclaimed wood, cedar, redwood, etc. |
| Size & Shape | Standard size and shape | Multiple size and tractor style options |
Let's start with a detailed guide to building your planter using Plan A.
Building Your Tractor Planter (Plan A): A Step-by-Step Guide
This guide walks you through Plan A. Safety first! Always wear safety glasses and work gloves.
Step 1: Gathering Your Supplies
You'll need:
- Untreated reclaimed pallet wood (check for chemical treatments). Why untreated? It's safer for your garden and the environment.
- Wood stain or paint (optional)
- Wood sealer (essential for outdoor use)
- Basic tools: hand saw or circular saw, drill (optional, depending on the plan), sandpaper, measuring tape.
Step 2: Precise Measurements and Cutting
Carefully measure and cut your wood pieces according to the Plan A dimensions. Accurate measurements are crucial for a successful build. Sand all edges smooth to prevent splinters.
Step 3: Assembling the Tractor Chassis
Assemble the main body of the tractor following Plan A's instructions. Use screws or nails for secure connections.
Step 4: Adding Wheels and Details
Cut and shape the wheels, then add details like an exhaust pipe, seat, and steering wheel. Get creative!
Step 5: Finishing Touches and Sealing
Optional: Lightly char the wood for a rustic look (always follow fire safety guidelines). Apply stain or paint (allowing ample drying time), followed by a weather-resistant sealant for longevity.
Exploring Plan B: Advanced Designs and Customization
Plan B provides a wider range of designs, from simple to complex, allowing for greater customization. However, carefully review the required tools and skill level before choosing a Plan B design, ensuring they align with your capabilities. Some designs may necessitate power tools like a table saw or router.
Sustainability and Safety: Key Considerations
Both Plan A and Plan B promote sustainable gardening by using reclaimed materials. However, always prioritize safety by using untreated wood and following safe woodworking practices.
Ready to Build Your Wooden Tractor Planter?
Choose the plan that best fits your skills and tools. Remember, this should be an enjoyable experience! Take your time, get creative, and enjoy the rewards of your DIY project! Happy building!
How to Build a Long-Lasting DIY Pallet Planter for Sustainable Gardening (Bonus Plan)
Here are key points for building a durable pallet planter (adaptable to a tractor design):
- Pallets: Choose untreated, sturdy hardwood pallets. Softwoods decay more quickly.
- Preparation: Clean, sand, and seal pallets for longevity.
- Construction: Use strong screws or wood glue for a sturdy, square frame. Drill drainage holes.
- Maintenance: Regularly inspect and re-seal annually for protection.
This extra project provides additional options for your sustainable gardening endeavors.